Kalalau Trail
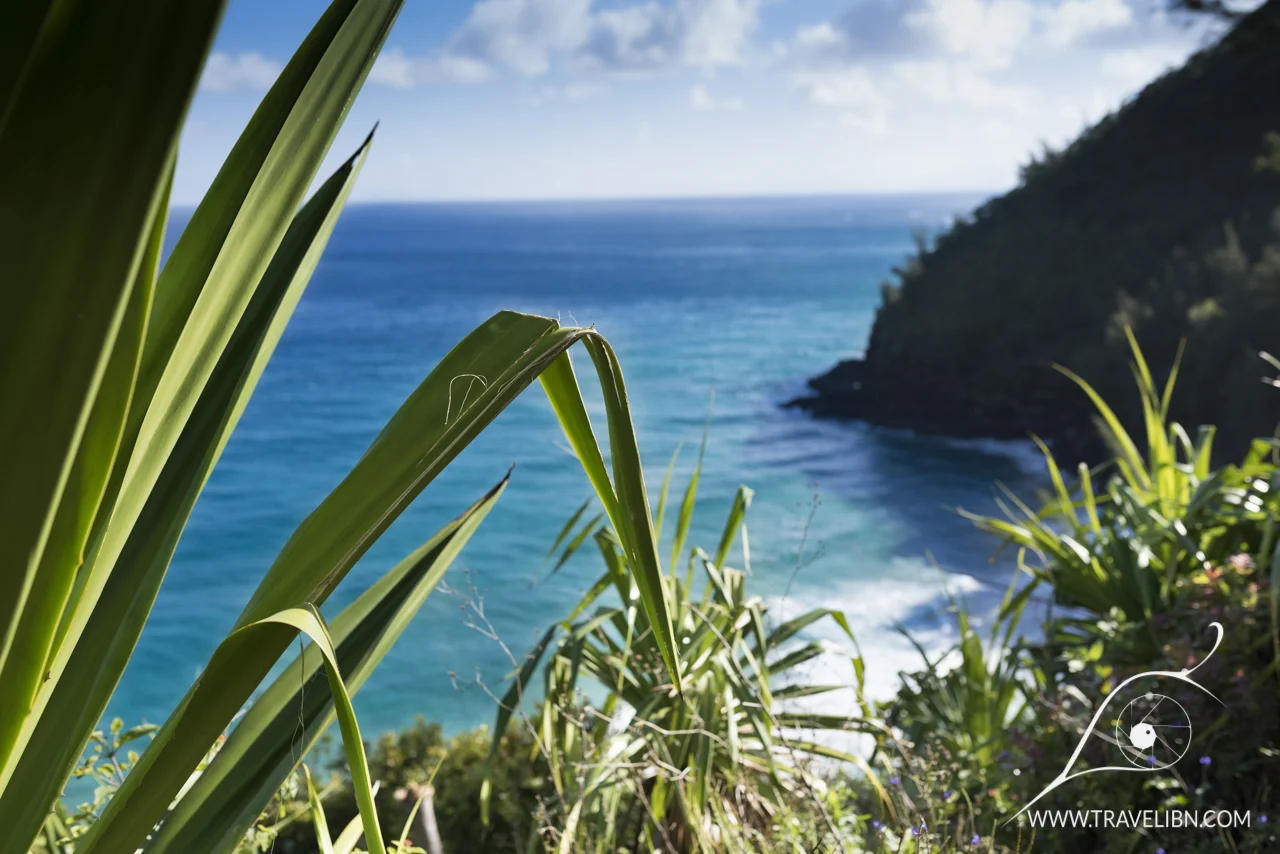
Kalalau Trail. 11 miles of rugged, undeveloped wilderness filled with unimaginable tropical beauty. On one side, emerald blue waters of the Pacific Ocean engage in a constant battle with the rocky coastline hundreds of feet below one's feet. On the other, erased some 5 million years ago, eroded to almost surreal shapes and forms, stand lava rock cliffs so beautiful it almost seems like it was carved by a giant artist. There are no man made structures visible anywhere on the horizon, no distractions, not a single thing, that reminds one of the troubles and stresses of a modern world. Just you, the ocean, the cliffs and the path that lays in front. This is THE HIKE in Kaua’i, if not in all of Hawai’i.
CONTENT
HUMAN PRESENCE IN KALALAU VALLEY
GENERAL INFORMATION
GEOLOGY OF KALALAU VALLEY
Please read my article about the geological processes that gave birth to the Hawaiian Islands :
Geology of the Hawaiian Islands
In addition, Please refer to in- depth article about Kaua’i geology to learn about the island creation process that shaped Kalalau Valley and the rest of Na Pali by visiting this link (COMING SOON). Meanwhile, here’s a shortened description on how Kaua’i northwestern coastline formed.
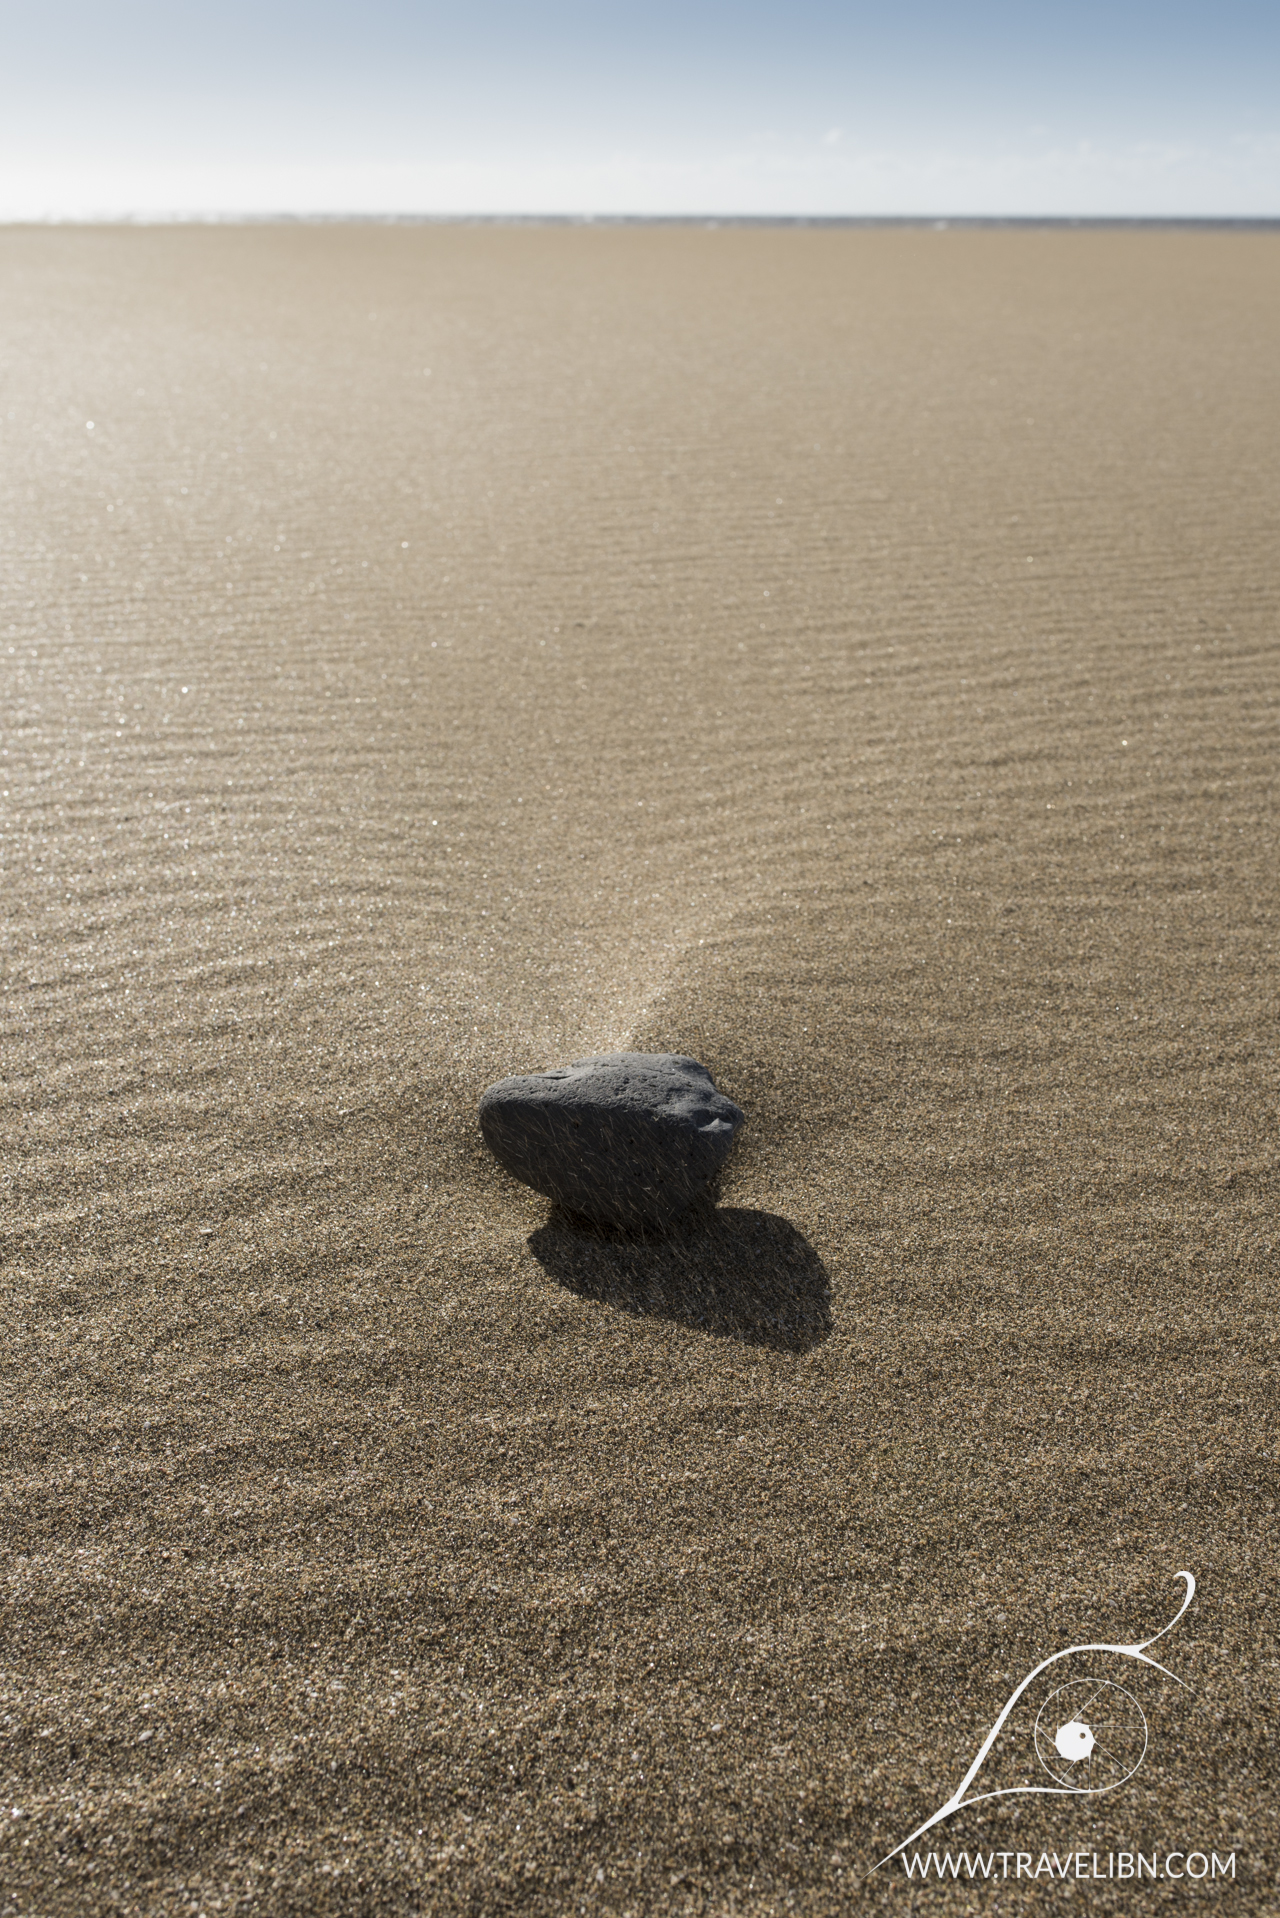
Kalalau Valley view from the trail.
Na Pali, which means "The Cliffs" in Hawaiian language, formed from around 4-5 million years ago till now through wave erosion. The enormous waves of the Pacific Ocean batter the lava rock cliffs as the island subsides, shaping the steep cliffs of the northwestern coast of Kaua'i. The presence of Alaka'i swamp and it's extremely rainy micro-climate directly inland of Na Pali, further "carve" the fantastic shapes of the many valleys and ridges this stretch of coastline has. Water sipping down the slopes dissolve softer lava rock that gets swept by the ocean waves, leaving permanent scars on the faces of cliffs.
HUMAN PRESENCE IN KALALAU VALLEY
Kalalau Valley, being the largest stretch of accessible coastline in Na Pali, was occupied by humans for hundreds of years before the island chain was “re-discovered” by Captain James Cook. Native Hawaiians settled in larger valleys in Kaua’i and lived a sustainable life, farming on the cliff slopes and taking fish from the fringing that protected these valleys from wrath of the Pacific Ocean. Recent archaeological excavation at Nu’aolo Kai Valley, located west of Kalalau, suggest that humans lived there continuously for at least 800 years, from XII till XX centuries. It is estimated that Kalalau Valley could have been home to as many as 2000 people, which is amazing considering the fact that resources were extremely limited and access to other parts of the island very hard to impossible at times. Hawaiians survived by creating water terraces in which they grew their staple food- taro plant- and by inventing new effective methods of fishing in the adjacent reef. There are remnants of ancient paths cut in the forest leading to Koke’e, which suggest the residents at Kalalau made regular trips up the valley. Imagine what kind of hike that must been!
The arrival of westerners to Hawaiian archipelago changed life on the islands drastically and irreversibly . New food crops and farming techniques were introduced in the XIX centuries and the economy changed, making life in these remote valleys rather unviable. It is estimated that smaller valleys like Nu’aolo, Miloli and Honopu, were abandoned in the late 1800’s. Kalalau Valley was occupied permanently up to 1930’s, but eventually people moved out as well to live in the more accessible parts of the island.
Shortly after that, Na Pali State Park was established and Kalalau Valley became officially a state land. Other valleys were sold to prospectors and used mainly to graze cattle.
The next wave of permanent residents came in the 1969 when Taylor Camp, a hippie colony, was erected in the nearby Ke’e Beach. From there, as many as 50 hippies moved to Kalalau Valley . Taylor Camp was eventually closed and it's resident evicted in 1977, which ended the era of hippie communities on Na Pali.
GENERAL INFORMATION
PERMIT
Let’s start with facts. Kalalau Trail in the Na Pali Coast State Park in northwestern part of Kaua’i is repeatedly on the top of the “Greatest hikes in the world” list and often labeled as the finest coastal trail on Earth. A position on many hiker’s “Must-do” bucket list, Kalalau is a popular backpacking trip to a remote beach nested between majestic, unreachable lava cliffs. There is no road that leads to Na Pali, the only ways to get to Kalalau Beach is to be flown in a helicopter (illegal in most situations), land a boat or kayak on the shore (same permit rules as for hikers apply) or by walking the trail.
Backpacking trip to Kalalau Valley requires a camping permit that can be obtained from State of Hawaii Department of Land & Natural Resources (DLNR in short) . Permits are released in the first week of January for a year in advance and they sell out very quickly. A trip to Kalalau needs to be planned well in advance, especially if you plan to travel in the busy summer months from June to September. We strongly suggest reserving camping permits not later than the end of January, otherwise you may not be able to fit your vacation plans within the available permit dates. You can make a reservation using the online system WIKI PERMITS. At the time of writing, rates are $15/per person/ per day for Hawaii residents and $20/pp/pd for everyone else. You can stay for up to 5 consecutive days In Kalalau Valley. A valid permit allows you to hike past Hanakapi’ai Valley at mile marker 2 and stay at the two campgrounds- Hanakoa and Kalalau Beach. Hikers without a valid overnight permit are legally allowed to hike the 2 miles (3.2 km) each way trail to Hanakapi’ai Valley and make additional, 2 miles each way, side trail from the valley to Hanakapi’ai Falls. If you hike past Hanakapi’ai Valley towards Kalalau Beach, the state authorities assume that you’re going to stay at either of the two campgrounds and therefore you are required to hold a valid permit.
There is an ongoing discussion regarding people hiking the Kalalau Trail without a permit. No one really runs any numbers, but based on the amount of hikers on the trail past Hanakapi’ai Valley at any given time, it is believed that there may be the same amount of people on the trail without a permit than there are ones holding one (don't take my word for it, as there are no officially published studies, just rumors). That doesn’t even take account for the “permanent campers” living in Kalalau (more on that later). This is how I see it- based on the fact we hiked the trail with a legally obtained permit and the information we gathered regarding the impact the “extra” people have on the trail, I think this situation needs to be resolved immediately to keep the trail open for future generations. Now this is only my own personal opinion, with which you may or may not agree, but I think the State Park System needs to establish a way to enforce and monitor the permit requirement on Kalalau Trail. Sure, you read about rangers flying in a helicopter at night to check permits renegade-style, but the reality is these “illegal camper manhunt” missions are rare and executed in an irregular basis, to the point where a lot of people online post comments such as “Don’t worry if you don’t have a permit, they never check it anyway”. That only fuels up the “ no permit- no problem” scenario and in effect you often see twice as many people camping in Kalalau than the daily permit quota. Then there’s an issue of the “permanent residents” living in Kalalau, but that’s a topic of a broader discussion and would take an article of its own to cover. Anyway, here’s my solution (and you may not like it:): regardless the fact all state parks in Kauai are free, Na Pali State Park should have an entrance fee that you would pay before entering the parking lot for Ke’e Beach (where the trail head is located). The money generated from it could pay to employ a ranger that would monitor people hiking in and out of Kalalau Trail. The way it would work is everyone who plans to stay on the trail overnight should register at the trail head and sign out after completing the hike. Obviously, there will always be some percentage of backpackers who are going to abuse the rule, but the simple fact there’s a person enforcing the permit rule would defer people from breaking the law. I know there are voices against state monetizing from Na Pali, the argument being that Kalalau Trail should be left wild and unregulated, however the reality is the trail became so popular in recent years, far more people are willing to hike it than the environment can handle. We're against any development in Na Pali State Park as many are, but I feel there has to be to be some kind if permit enforcement to prevent over-use. Let’s face it, everyone wants to go, but there’s no room for all of us. The one issue I see with my solution is parking space- there is simply not enough parking at Ke’e Beach and to establish an entry fee, the county needs to find some way to accommodate more visitors. Please comment and let me know if you agree/disagree with the solution presented. I obviously know too little about Kauai County government to argue if this is a good way to keep Kalalau Trail beautiful, nevertheless I would like to know your opinion on the case.
OK, enough politics, let’s go back to the trail...
KALALAU TRAIL FACT SHEET
Philippine Ground Orchid- Spathoglottis plicata
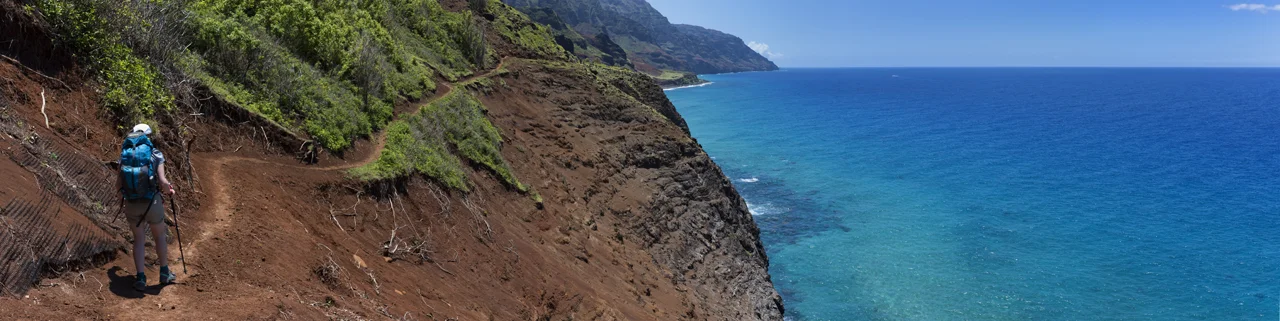
As you may already know, Kalalau trail is not an easy hike. There are several factors that make this a difficult, sometimes dangerous yet extremely rewarding trip. Let’s roll the numbers- Kalalau Trail is a 11 miles (17.7 km) out-and-back hike that starts in the northern part of the Na Pali coastline and ends in a campground on the remote Kalalau Beach. It traverse through five valleys and number of cliffs on a path that has been used for hundreds of years as a way to get to this part of the island of Kaua’i. The 11 mile distance may seem as a moderate day hike for an experienced hiker, however, the way this trail leads to Kalalau Valley is through a roller coaster of ups and downs, climbing cliffs and descending to evergreen valleys, crossing streams and managing technical sections of narrow pathways on cliff sides. Below is a simplified elevation change profile I prepared after the tracking data from my phone app. The actual elevation gain/loss is around 5000 feet (1520 meters), which makes it a true day workout for all but extremely fit people.
Please note this elevation profile is simplified for an easier understanding of the hike difficulty. The actual hike will have few smaller elevation changes in between the 0.5 mile sections.
Below is a map of the entire hike (thanks to Google Maps) with locations of POI on the trail.
The first two miles of Kalalau Trail are a good introduction on what to expect when planning to complete the entire hike- first mile is a constant uphill trek to the top of the ridge at 600 ft (183 m) and then a downhill almost to a sea level to the first point of interest- Hanakapi’ai Valley. The valley is an endpoint for those who don’t carry a valid permit and an intersection with a trail head to Hanakapi’ai Falls (also accessible without a permit). The trail to the falls is 2 mile each way and combined with the first section of Kalalau Trail makes up for a 8 mile (13 km) round trip day hike. You can also make a side-trip to Hanakapi’ai Falls while doing Kalalau Trail, but you need to be aware of your limitations and track time not to get caught on the trail at night (some people actually hike the trail at night on purpose, if you’re one of them, you don’t really need our advice:)).
The section past Hanakapi’ai Valley starts with another brutal climb to the trail’s highest point at approximately 700 ft (213 m) above sea level. You will be following a series of switchbacks, constantly changing altitude and putting extra effort on your knees and back, until you reach a so-called middle point few hundred feet past mile marker 6- Hanakoa Stream and adj-acted Hanakoa Campground. This charming little campground offers few campsites, two shaded picnic areas and composting toilets. Beside the campground at the end of Kalalau Trail, Hanakoa is the only other official campground where you can stay overnight (the limit is one day each way of your hike, meaning you are not allowed to stay at Hanakoa for two consecutive days). It’s also a great spot to refuel- you can eat right by the stream and use the water to replenish your reserves (after treating it of course). Hanakoa serves as a reality check- if you got to this point and are extremely tired, you can always split the hike into two days and stay at the campground. It’s not as spectacular as the campground on Kalalau Beach, nevertheless it’s a great spot to cool down and rest, if needed. In addition, right after crossing Hanakoa stream, there’s a trail head for yet another waterfall hike- the 1.6 mile (2.6 km)round trip Hanakoa Falls trail is worth doing if you have enough energy for the additional mileage. We did it on the way back and it was amazing- read further for a full description.
Two things happen after around 6.5 miles (10.5 km) into the hike- one is that the trail changes dramatically, from a tropical jungle it transforms into exposed, arid, cliff hugging path. The chance is you end up here around noon- 2 pm and therefore should be prepared for the unforgiving heat of the midday sun. The other thing is the trail becomes narrower and more technical. The infamous section between mile 7 and 8, known universally “A Crawler’s Ledge” is the most difficult part of the trail that requires sharp focus and carefulness. I will share my experience hiking this part later in the guide, for now I can only summarize it as “dangerous yet extremely beautiful section” of Kalalau Trail.
Mile markers past Hanakoa Stream are easier to spot (in fact, I couldn’t find any between Hanakapi’ai and Hanakoa), therefore you can track your progress and estimate arrival easier. Leaving “Crawler’s Ledge”, the remaining 3 miles of the trail are not a bit easier. The dry, cacti and low shrub dominated landscape contrasts beautifully with red colored ridges and jet black cliff pillars. Around mile 8.5 awaits the last big climb to the top of the ridge overlooking Kalalau Valley. Coming down the ridge, an amazing view reveals itself - a boulder shaped, rust colored hill known as “Red Hill”. In the back, majestic pillars of Kalalau Valley, in front the endless Pacific Ocean. Hiking down the hill you encounter the last stream crossing and finally, the final point and the ultimate destination- Kalalau Beach. The one mile stretch of golden sand is locked in between impassable cliffs, the ocean and a jungle where primitive campsites are located. It’s “first come-first serve” rule here, so the earlier you come, the better spot you might get. You can camp anywhere you want as far as it’s safe to do so. Nature even provided a shower station in form of a cascading waterfall -Kolea Falls- where you can take a dip to cool yourself after long day of hiking. There are two wave erosion formed caves at the far side of the beach that are usually flooded in the winter to spring months.
The end of Kalalau trail intersects with one final path that explores the interior of the valley. It is called Kalalau Valley Trail and leads to a waterfall and Big Pool, a two bodies of water interconnected with a natural water slide. It is 2 miles (3.2 km) each way and it’s rated as moderate.
PRECAUTIONS
There are numerous sources that portrait Kalalau Trail as an extremely dangerous hike and therefore discourage travelers to attempt it. True, the Na Pali coastline is a an unpredictable place, although it is at the same a fantastic creation of nature that, with a little caution, is worth exploring. That being said, there are few things that need to be pointed out in order to enjoy the hike fully and don’t get caught in an emergency situation.
First of all, Kalalau Trail is a difficult, all day long hike in true wilderness and therefore requires some preparation from anyone attempting to do it. You should be in moderate shape and have previous hiking experience in rough terrain. A good rule of thumb is to plan your vacation so you have time to practice hiking other trails in Kaua’i (there’s plenty to choose from). As I mentioned before, Kalalau Trail is a constant roller coaster of ascending cliff ridges and descending to valleys in between them. The total elevation change of 5000 Ft (1520 m) makes it all but easy hike, but on the other hand, you’re constantly surrounded by beauty, which distracts from the hardship of the path ahead of you. The campground located after mile 6 of the trail makes it a great breaking point for those who need to take their time. Hike at your own pace and don’t worry if you take more time than others. Speaking of time, the trail takes anywhere between 6 to 10 hours to complete for an average hiker, depending on each person’s speed and, most importantly, the weather.
Weather changes rapidly in Kaua’i and is generally unpredictable, therefore you should always come prepared. One particular thing that needs to be taken seriously are stream crossings. When you google “deaths on Kalalau Trail” most accidents involve not (as many think) people falling off cliffs but hikers being swept to the ocean by rushing water (and by drowning in the ocean). The most dangerous conditions are after heavy rainfall and that can come at any time during your hike. A good way to tell if you may encounter flash flooding conditions is to observe stream water- if it’s yellow and murky, there’s a good chance the stream soon may be impossible to cross. Never attempt to cross a stream that is flash flooding, no matter how safe it looks. It’s better to wait or turn back if you get caught in such situation rather than trying to prove you can make it. The only way for rescuers to reach you is by helicopter and that requires time and effort, so make sure you have supplies for an extra day or two on the trail.
Finally, the hazard everyone is talking about- exposed sections of the trail where path narrows and there’s nothing between you and the ocean few hundred feet below. The (in)famous part between mile 7&8, universally known as “The Crawler’s Edge” is by far the most brought up as an example of the trail difficulty. Fueled by pictures of hikers clinging to the cliff and video montages from chest mounted Go Pro cameras showing people looking over the edge, paint a negative picture of the entire trail. I have to admit I’m no different and also watched these YOUTUBE videos biting my nails in fear of falling. All jokes aside, in reality the entire second half of Kalalau Trail is more technical and requires focus and careful steps, but it’s also far less dangerous than your mind tricks you to think it is. You only need to slow down, probe the ground you’re putting your foot on and don’t think of worst case scenario with every step you take. If you have nothing more than average fear of heights (as most people do), you will be fine and feel proud of your achievement after completing the sketchier parts of the trail. All that is true under one condition- the weather is good. You would not persuade me to get trough Crawler’s Ledge in pouring rain and/or in high wind- no thank you, I rather wait until conditions improve. In summary, there are parts of the trail that need your attention and where you need to overcome some of your fears, but, at the same time, these are the most beautiful, rugged and interesting sections of Kalalau Trail.
One more hazard worth mentioning are unsafe swimming conditions in this part of Kaua’i. There are very strong currents, rogue waves and rip currents that can draw an unsuspecting swimmer out to the open ocean. Use this photo I took near Hanakapi’ai Beach as a proof that Pacific Ocean is an untamed force that deserves great respect.
HOW TO GET TO THE TRAIL HEAD
Kaua’i is a laid back island with far less tourists that it’s “neighbor” Oahu and therefore public transportation is very limited. The trail head for Kalalau is located at the end of Kuhio Highway (Hwy 560) in Ke’e Beach State Park parking lot and the best way to get there is by car. There used to be a county operated bus from a nearby town of Hanalei, but I’ve read it was terminated few days before I started writing this article. You can take a cab to Ke’e Beach, but costs are rather high unless you carpool. Another option is to stay somewhere close to Na Pali Coast State Park and hitchhike to Ke’e.
Here's a map with marked location for the parking lot/trail head.
If you’re planning to drive a rental car to the trail head and leave it for the time you are on the trail, be aware that there are instances where hikers came back to their vehicles only to find their window smashed. There are reports of break-ins at Ke’e Beach parking lot, but from what I assumed reading comments, most people never had that problem. We’ve personally left the car locked with all valuables removed for 3 days at Ke’e and nothing bad happened, but you may be the unlucky one. Some hikers leave their cars open to avoid broken glass, but that voids the rental agreement. A safer option is to park at nearby Haena State Park that is busy 24 h due to a campground located just steps from the parking area and walk/hitchhike to the trail. Whatever you decide to do, make sure you are prepared for the worst and buy the additional theft coverage from your car rental provider.
WHAT TO TAKE
I would like to mention beforehand that the content of below paragraph is based sorely on our own experience and should not be taken as an absolute guide to backpacking the Kalalau Trail. We are by no means experts in the field, just sharing our experience and knowledge after completing this amazing hike.There you go, you’ve been warned :)
The one advice regarding a backpacking trip to Kalalau Valley shared almost universally across various hiking forums is to “pack light”. It is by no means a good tip, but it may have different meaning for different people. Some hikers can haul a 40-50 lbs. pack all day with no problem, while others may struggle with half that weight. I personally think there are few essentials everyone should have with themselves to fully enjoy the trip. Here they are:
Permit in a waterproof sleeve- that one does not require explanation:)
Tent/hammock/sleeping bag-the decision whether you sleep on the ground level or dangling between two trees comes down to personal preference and weight. Tent has an advantage of being the best rain, wind and mosquito protection there is, but it adds significant weight to the pack. Hammock is much lighter, takes less space in the backpack and comes with a “cool factor” of being, well, a hammock (I've read somewhere that you can't get angry while swinging in a hammock and it's somewhat true if you think about it:)). If you’re hiking solo and are concerned about weight, that may be a better option, however you have to pack a sleeping bag with it to overcome the night’s chill, while in a tent you should be fine with just a light sweater/ thermal shirt and a blanket. Although Kaua’i is a tropical location, the ocean breeze may bring cool air at night, which us uncomfortable for some. If you hike with a friend or a group, tent camping is preferable as you can split weight by redistributing tent components among hikers in the group.
Mattress/sleeping pad – again, it’s up to you – either you don’t mind sleeping on the ground or prefer to have some distance between your body and dirt (hammock campers have that portion already covered). I would only advise against bringing a full size air mattress to the trail- it’s big, bulky and weights a ton. We always use these compact sleeping pads and swear by them- inexpensive, you can pack them to this size PHOTO and they weight only 18.1. Plus, they double as beach towels too:)
Water treatment- you HAVE TO treat water from streams and rivers in Kaua’i. It may contain a bacteria responsible for leptospirosis- a dangerous disease transmitted to humans through domestic and wild animals. People get infected by drinking or having contact (through open cuts or bruises) with water contaminated with infected animals' urine. Symptoms vary from mild (flu-like symptoms- headaches, fever, vomiting, diarrhea) to life-threatening (brain damage, infection of the lungs, kidneys, heart and liver). Please don't underestimate the risk and treat your water. The only two effective ways to kill the bacteria is either chemical treatment (Iodine tablets) or UV sterilization. The first option is cheaper and easier to apply (just drop the correct amount of tablets into water to be treated and wait 30 minutes before drinking), although the water tastes rather bad, even with the additional treatment of iodide neutralizing tablets. It’s not undrinkable bad, but you can taste the chemical on the tongue. Iodine treatment pills are tiny and weight next to nothing, therefore they should be on every backpacker's list. This is what we used LINK UV filters also called UV pens are the elite of trail water filtration and they cost accordingly. They should be used in conjunction with some form of mechanical filtration to grab larger particles from the water. We don’t own a UV pen so I can’t make a recommendation, however there are tons of reviews online so you shouldn’t have a problem picking one that suits your budget
Water containers- water sources are frequent along the trail, so fortunately you don’t have to haul gallons of it with you. I would recommend having a minimum of 1 quart of water at anytime on the trail and refill at every stop. Be sure to treat water before drinking (check previous paragraph). We personally use the foldable Vapur bottles and a hydration sleeve on our hikes to cut weight. A good idea is to buy one large, collapsible water jug to have while staying at the beach (this is what we use). A waterfall at the far end of Kalalau Beach acts as a community shower and refill station.
Rain gear- it rains frequently on Kalalau Trail, so bring a light rain jacket, waterproof shoes and a rain cover for your backpack. A minimalist approach would be a backpack rain cover (don’t skip that) and a combo of wicking t-shirt and pants made of synthetic fabric that dries quickly. We found the later preferable, however we did not experience pouring rain on the trail, so our opinion is somewhat biased :)
Footwear- yet another piece of hiking gear that is up to one’s preference. We usually hike in over-the ankle waterproof boots, but we’ve chosen trail runners for this one and I think it was a good pick. Trail-running shoes are exceptionally light and most of them have an under sole that just works in Kaua’i dirt. The path may be slippery, especially after rain, therefore good traction is essential for this kind of terrain. Bring also a second pair of ultralight sandals, cheapo flip-flops or water shoes for crossing rivers and wandering around the beach. Just please don’t hike the trail in any of them, that’s just silly:)
Clothing layers- I’ve read that it’s always warm on Kalalau and my visit proved that to be accurate. I think majority of hikers will be fine with a pair of convertible hiking pants (with zip-off legs), a synthetic blend shirt, a rain jacket and/or a light sweater/hoodie and some kind of a hat to protect against midday sun. If you’re a cold person, take an extra fleece blanket.
Good pair of socks- I’ve used to hike in ordinary cotton socks few years back, but when I bought my first pair of Merino wool socks, the difference is like a day and night. Wool socks are extremely comfortable, do not “sweat” like cotton and last much longer. Expect to pay between $10-$20 for a pair of Merino wool socks and I’m sure it won’t be your last pair.
Sun protection- sunglasses, some kind of summer head wear and sunscreen are mandatory on Kalalau Trail. The second leg of the hike is almost all exposed and keeping your skin protected goes a long way
Mosquito repellent- there are mosquitoes along the trail and if you can’t stand their stingy presence, you should arm yourself with a small amount of repellent
Extra bags/ziplocks for trash and wet gear- Kalalau Trail has a “take out what you brought in” policy and the last thing you want to do is contribute to the pile of garbage inconsiderate hikers leave behind that other need to clean afterwards
Swimwear- swimming in the ocean on Kalalau Beach is considered a risky endeavor at all but calmest days, nevertheless you can stay by the shore and have some fun under the waterfall, so unless you prefer the clothes-off option (like many do in Kalalau), a swim wear is good to have. You can hike in it to the beach too ( I did) if you want.
A piece of rope- a true lifesaver- stretch it between two trees and you have an instant clothesline- less clothes taken on the trail is a lighter pack! In addition, an emergency shoelace!
Flashlight- Kalalau Beach and the entire trail is pitch black at night. We prefer LED headlamps that take AAA batteries, I also have one with rechargeable battery that can be charged with any mini USB charger (it's called Goal Zero Flashlight) The importance of having a source of light in the wilderness is indisputable
Food- how much food is needed depends on every individual person nutritional needs. The rule of thumbs is to bring food that’s the lightest and has the most nutritional value. That combination is easily obtainable in form of pre- packed, ready to eat freeze dried meals. Just add boiling water, wait a couple of minutes and eat. We took a bunch of ready to eat meal pouches to have enough for three meals a day. Check this deal, the Mountain House freeze dried meals are really good (for camping food that is) and extremely light. In addition, you can eat straight from the pouch, no bowls needed. For snacks, pick something light as well, like nut trail mixes, Japanese- style snack packs (I love them), meat jerky or freeze dried fruit. Don’t take anything that adds unnecessary weight to your pack like chocolate (it will melt quickly), canned food or food that require significant amount of time to prepare. You will reward yourself with a full course meal in one of the charming restaurants in Hanalei after completing the trail.
Cookware- a camping size pot, one spork (gotta love this made up word) for each person in the group and a water bottles all you need to cook on the trail. Here’s our set, inexpensive, works wonders: spork and pots
Camping stove- if you enjoy hot meals while backpacking (who doesn’t), you need a camping stove. Two systems that come to mind are Jetboil and Pocket Rocket. Both are very light & compact and take 4 & 8 oz. fuel cans. Be aware that people report having their camping stoves confiscated at airport security as you are not allowed to carry any compressed gas onto a plane, be it in a cylinder or fuel line of your camping stove. Generally speaking, you shouldn’t have a problem carrying new, unpacked stove, but you are at the mercy of the TSA officer. If you are afraid of being forced to give away your expensive stove, buy a pocket rocket knock-off like we did - it’s really cheap and works just fine. It also has a piezoelectric ignition in case you loose your matches. Just remember, you cannot carry gas cylinders onto an airplane, you have to buy them locally. Many places in Kaua’i sell these cans, we got ours in Ace Hardware in Princeville
Toilet paper- there was toilet paper in the composting toilets when we hiked the trail but hey, you never know:)
Lighter/matches- every camper companion, I personally prefer Zippo lighter rather than gas one or matches. TSA recently changed their rules and you can bring one Zippo lighter in your CARRY ON baggage. No extra fuel though. You can collect firewood at the beach and have a campfire at night (finding larger twigs is quite an adventure on it’s own :))
Hiking sticks- I am a big fan of telescopic hiking sticks, they are light, don’t take much space and make one’s hike more enjoyable. I found that on Kalalau Trail one stick works best, while the other hand is free to take photos or hold onto rocks in sketchy parts like Crawler’s ledge. Ideally, you would want a carbon fiber sticks for maximum weight to performance ratio, but even cheap aluminum ones do the job. We have these carbon fiber ones and are very happy with them
First aid- you don’t need to go crazy and bring a whole pharmacy with you, but it’s always wise to have few bandages, alcohol soaked wipes, a small roll of gauze and painkillers with you
Leatherman or other multi-tool- it’s not absolutely necessary to have one, but in my personal experience I found it saved the day more than once.
Booze- it’s illegal to drink in any of Kaua’i state parks, but if you HAVE TO have something as a reward for full day of hiking, do yourself a favor and ditch the glass bottle in favor of a plastic one
Money- “Who needs money in the wild?” you may ask. Well, we live in a society where even in places like Kalalau Valley cash finds its use. One such instance will be when you are sure the hardship of the trail ought to be too much for you and you wish there’s a way to avoid hiking back. Locals offer such service (which is illegal by the way) by taking you back to civilization on a jetski/boat ride in exchange for $$$. I’ve read this business became so organized they even allow you to pay later by taking you to an ATM after a ride on Na Pali coast, but don’t take my word for it, it’s just something I’ve encountered while checking online forums on the topic
Photography gear- most hikers are equipped with a camera phone, Go Pro or other rugged video recorder or a point-and-shoot camera. For all those who are crazy enough to haul a full size DSLR with big ass lens, do yourself a favor and get a Cotton Carrier. That thing is absolutely amazing in easing the back and neck pain from walking around with a 6+ pound brick for a full day in the wilderness. There are now knock-off versions of Cotton Carrier you can buy online, but the original includes an Arca Swiss style plate attachment, which is in my opinion much more versatile when using a tripod for your photography. Speaking of tripod, it’s up to you if you want to have the extra weight with you on Kalalau Trail, but if you feel like you may need one, get a travel sized one, preferably made of carbon fiber. We’ve took one on the trail with us to shoot stars, unfortunately though, it was cloudy on both nights we’ve stayed at the beach. Nevertheless, we’ve managed to get some interesting night shots for our collection that could not be possible without a tripod. When it comes to lenses, I advise to pick one and stick with it as any additional photography equipment adds unnecessary weight that can be used for better purposes, like extra food or clothes. Generally speaking, a good range (24-120 mm or similar) travel zoom lens will work the best for all but extreme subjects on the trail. We’ve took a prime 35 mm lens instead just because it’s a freaking bad-ass piece of optics:) Skip the out of camera flash, you won’t need one. Take extra batteries if you are a machine gun shooter though.

Content of our backpacks
It seems like the list is overall to long for a hike in the tropics, but when you collect all the necessary equipment, you’ll find that it doesn’t take much space in the backpack and shouldn’t weight more than most people can handle. That being said, here’s a short list of things you can omit as their usefulness is limited on Kalalau Trail:
Full size sleeping bag- unless you are planning to sleep without a tent, a sleeping bag is unnecessary, you will be fine just dressing in layers you brought for the hike or using a cheap fleece blanket.
Beach umbrellas, folding chair and other beach equipment- you don’t need any of that- the sand is nice and soft to touch and there are enough trees for everyone to escape the midday sun
Compass and/or tracking devices- it is extremely hard to get lost on Kalalau Trail. The path is straight forward and you can see the ocean on almost entirety of your hike. There was only one instance where we found a fork in the road (after Crawler’s Ledge towards Kalalau Beach) but even there it was clearly marked which was the right path to follow. I’ve used a tracking app on my phone only for purpose of writing this guide, but other than that I find tracking your pace pointless (unless you are a statistics freak:))
Cellphone- I am not discouraging you to leave one as almost all cell phones double as a quite capable photo camera/ video recorder these days, just don’t expect to get any reception alongside the trail. That is true for all carriers (please correct me if I’m wrong) unless you use a satellite phone
Portable speakers or other noise making devices - be considerate to other hikers, take a book and listen to waves crushing on the beach instead
Sweets that contain chocolate- for the simple fact they will melt quickly and you will look stupid licking chocolate mess off the wrapper
Extra fuel for camp stove- one 8 oz gas can is enough for two persons- three meals & coffee- 3 days on trail.
Snorkeling gear- some outdoorsmen take fins and mask to swim from Kalalau to neighboring Honopū Valley (which is impressively the way), but all the others should avoid hauling the extra weight because of the unpredictable nature of the ocean in this part of Kaua'i and because there are better places to snorkel (Big Island for example... ok, just kidding)
Dish-washing liquid, shampoo and/or soaps- for few days, the force of a water rushing off a waterfall is all you need to keep you and your dishes clean. If you absolutely need soap to wash your body, bring a chemical free one as others may use your run off water to drink and reef fish hate when you pollute their environment.
Anything that you think you won’t need and can leave behind for others to use- “leave no trace” is the best way to enjoy the trail, the more we all follow that rule, the longer Kalalau Trail will stay beautiful
THE TRAIL

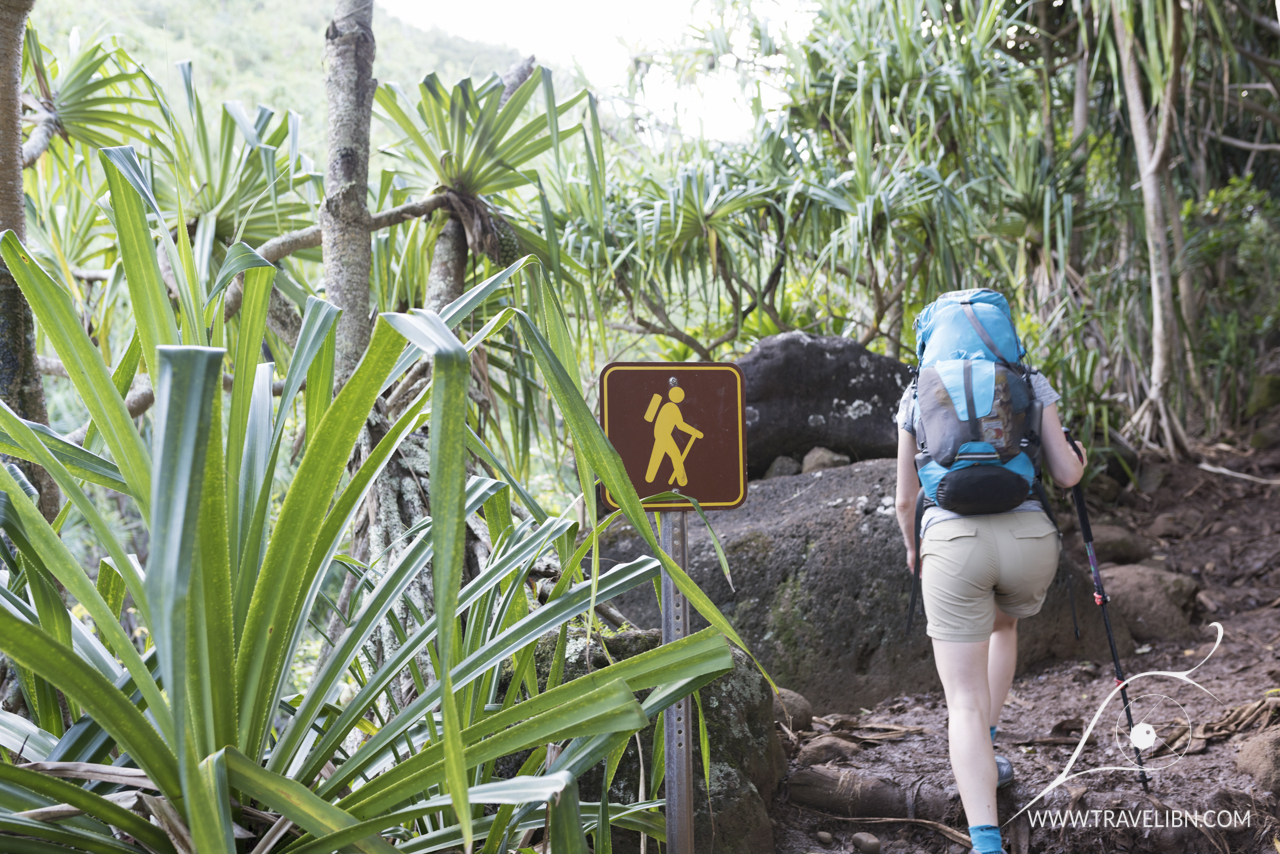
We arrived on a sunny Saturday morning in Ke’e Beach parking lot ready for what turned out to be the hike of our dreams (spoiler alert!). The sun was rising on the horizon as we were parking our rental car next to fellow hikers also preparing for the 11-mike trek to paradise. The night before, we spread the content of our backpacks on a bedroom floor, arranged it to best fit the limited space we’ve had and tossed out the equipment we thought we can live without (an extra lens, a pair of way to heavy hiking sandals and frog togs). Our decision to get up as early as humanly possible to start the trail paid off later in the day, but I’ll get back to it in few sentences. Anyway, we said hello to people we were going to share the trail with, took some photos with the trail head sign and off we went on the path to Kalalau Valley.
First mile of Kalalau Trail is a good primer for what lays ahead. A constant uphill struggle with a worthy reward at the top of the ridge- panoramic view of northern portion of Na Pali and Ke’e Beach with its adjacent reef below. The scenery is absolutely breathtaking- red colored, volcanic dirt path surrounded by vivid green tropical foliage and the emerald blue Pacific Ocean turning snow white as the waves batter the shoreline. At this point we agreed even for people without permit, this day hike is an amazing one.
After reaching top of the ridge, the trail takes a 180 degree turn and descends rather steeply towards Kalalau Trail’s first highlight- Hanakapi’ai Valley. The fact we started our hike early allowed for some solitude- the wave of day hikers did not arrived yet, it was only us and people we met at the parking lot. Around mile 2 into the hike we reached first natural obstacle in form of Hanakapi’ai Stream that needs to be crossed over in order to continue towards Kalalau. When the stream is in its flooding stage, crossing it is impossible and you usually find that out by bumping into a red tape at the trail head informing you the trail is closed until conditions improve. In fact, we arrived few days earlier to familiarize ourselves with the trail (we planned a day hike to Hanakapi’ai Falls) and found the trail closed. To avoid repeating our mistake, check this site to see current trail status.
Hanakapi’ai Stream was ankle to knee deep and fairly swift when we were crossing it. There was a way to cross it without getting feet wet (through a technique known as boulder hopping), but we decided it will be safer to take our trail runners off and put a pair of water shoes instead. Few minutes later, we found ourselves in front of Hanakapi’ai Beach and the meeting point with a trail head to Hanakapi’ai Falls. It’s a 2-mile each way diversion in case you are planning to add the extra mileage to your hike. Since we did not know how hard is the rest of Kalalau Trail, we did not planned to push our limits that way.
Hanakapi’ai Beach was a short stop as we decided to push on and get to the half point before the midday heat. The beach itself is "sandwiched" between two ridges and you can’t see much. The ocean was so rough it screamed not to get in the water. In fact, there are multiple warnings against swimming in this area as it is a well known drowning spot that takes unsuspecting tourists' lives year after year.
The second murderous ascend awaits past Hanakapi’ai Valley, after which the trail becomes a little gentler on the knees. At some point we crossed a gate informing that the area belongs to Hono O Na Pali Natural Area Reserve, then a couple of smaller waterfalls and a fantastic lava rock formation Picture. There are total of 5 valleys to walk through before ending in Kalalau Valley, but only two (Kalalau and Hanakapi’ai) have beach access. The ones you’ve seen before reaching the so called middle point- Hanakoa, are beautifully green, lush and remote. If you’re low on water, there’s a stream crossing between mile 4 and 5 called Waiahuakua Stream, where you can refill. Otherwise, push for another 2 miles to Hanakoa Valley.
We arrived to Hanakoa Valley few minutes before 10 AM, tired but wanting to push forward and see more of Kalalau Trail beauty. Hanakoa Campground “lives” in the shadow of its famous counterpart, Kalalau and is often cited as a far less enjoyable place to stay overnight. After seeing what it has to offer I have to disagree, it may not be a perfect place to stay on your way in, but if you are willing to split your return to two days, consider Hanakoa. There is no beach access as you are at 500 ‘ of elevation, however the jungle setting and constant hum of the stream water rushing down the cliff create it’s own, unique aura. There is a composting toilet and two shaded picnic area near the campsite, as well as another side trail head to the base of Hanakoa Falls, a 1400 ft (427 m) cascading waterfall. The trail is 0.5 mile (0.8 km) each way.
We’ve set up our improv kitchen right by the stream, took shoes off and dipped our feet in the cool, refreshing water. Hanakoa is a great spot to stop for lunch and to refill water bottles, not mentioning the so sought after break after half day of hiking.

Hanakoa Lunch break
Our stop was brief but long enough to refuel and “breath in” the beauty that surrounded us. We packed our bags, collected the little trash we produced and headed towards the ultimate destination. At this time of the day, we started passing hikers coming back from Kalalau, all of them cheering us up saying “You’re almost there, you won’t regret it!” So far, Kalalau Trail proved to be quite challenging, but not unlike trails we encountered on mainland. It kind of reminded us of some of the hikes in Utah we did few yeas back. The weather was great and morale high, so we pushed on in the midday sun, mesmerized with the geological formations Na Pali is so famous for. The trail past Hanakoa Valley transforms drastically- the overgrown jungle setting is replaced by a much more open, arid landscape of red cliffs, low lying shrubs and cacti. This part of the trail is like being in another place entirely, the colors and shapes that paint the landscape are like nothing we’ve seen before. Lack of vegetation on cliff slopes makes the trek appear more dangerous and sure enough the path narrows to merely a foot wide in places, with nothing but a few hundred feet drop between a hiker and the Pacific Ocean down below.
The infamous Crawler’s Ledge starts right after mile 7 (mile markers are easier to spot now, look for number etched on boulders laying next to the trail) and continuous for another mile or so. It is scary in parts but all you need to do is stay focus, watch where you put your foot and don’t rush to get past it. The scenery is nothing short of breathtaking and we quickly overcame the fear of heights start in awe over the amazing scenery. Fortunately, the weather cooperated greatly that day and we had very little wind and no rain at all. It’s hard to describe the emotions after completing this technical part of the hike to someone who never did it as every single person reacts differently to the natural dangers, especially when it comes to narrow, steep ledges on the side of a cliff. All I can say is that pictures you find online do not do justice to when you’re actually there and have to cross it in order to get to a place you trying so hard to reach. All I can say, well, repeat rather, is: It's not as bad as it looks.
So we made it through the scary part (in retrospective I have to say there were a couple of switchbacks after Crawler’s Ledge that were equally dangerous to pass through) and finally reached the last leg of Kalalau Trail. An amazing, hard to describe in words view reveals itself after a series of zig-zags- the so called Red Hill. As they say, a picture is worth a thousand words so here you go:
We couldn’t help ourselves but stand in awe for the beauty of Kalalau Valley with its sharp, green peaks extending down to a jungle that ends with a rocky shoreline hammered by the Pacific Ocean. We didn’t quite got there yet but seeing that wonderful scene in front of our eyes, we instantly knew it was worth every effort to get there.
Descending Red Hill, we got a glimpse of our temporary home for two days- a mile stretch of yellow sand known as Kalalau Beach. One final stream crossing and we were standing in front of a wooden sign pointing to the campsite. There were dozens of people already camping either directly in the beach or in a forest behind it. We found a perfect spot to set up our tent and I looked at my watch- 3.30 PM. Wow, we’ve had the rest of the day to explore the beach! Starting the trail early really paid off!
Kalalau Valley is a magical place, almost like it was erected on purpose, just to amaze travelers willing to walk the uneasy path to get here and witness its beauty beforehand. The way millions of years of water erosion carved these impossibly steep mountainous cliffs truly is nature’s masterpiece. There is a earlier mentioned waterfall in which you can wash off the efforts of the day as well as two natural caves carved in the lava rock by wave action. They were dry and accessible to explore at the time of our visit. The moment you see it all, you feel like you want to stay here forever.
For those sensitive to such things, there are naked people wandering around the beach. Those are “permanent” residents that live in the valley and take care of the beach. I found them being friendly and helpful, I’ve seen some of them collecting garbage others left and hauling it onto a boat anchored at the beach, which got me to believe they are sort of unofficial keepers of the valley. I wish there was a way where the state could incorporate these people into some kind of management program to maintain the trail and campgrounds, but again I understand the problem is much more complicated than that and it could encourage more and more people to stay in the valley for prolonged periods of time.
Anyway, we’ve ate our freeze-dried dinner and unpacked the tripod plus other camera equipment for a night session under the stars. What we did not expect was that the Moon had other plans and when it showed up from behind the valley’s pinnacles, it lit up the entire skyline, illuminating other celestial bodies. It was a magical event, the Moon was so bright that the entire beach was visible and even though I couldn’t capture any stars, it made an unforgettable impression seeing our satellite in all its glory.
The next day we made a plan to explore the beach even further and by late morning, get off on a hike to the back of the valley (the trail head is located near Kalalau Stream). Unfortunately, lying on the beach and looking back at the cliff, we dropped the idea and spent the day looking at 360 degrees of unimaginable beauty. I don’t know if I ever felt so relaxed and “happy in the moment” as that day with Kamila next to me, birds flying overhead and the sound of waves crashing at the beach filling our ears. Now that I think about it, I wish we could stay one day longer to get back to that idyllic state of relaxation (and do the hike of course).
That night we went on a mission to find firewood, which turned out to be like looking for a needle in a haystack. We’ve found one or two larger twigs and a bunch of smaller ones, I fired up my buddy Zippo and... well, here’s a digital memory of that moment

Campfire Kalalau Campsite
The next day begun with a preparation to get back on a trail as quickly as possible. We’ve been ready within an hour, ate a quick breakfast (Mountain House freeze dried Oatmeal, yummy), waved the fellow campers goodbye and set ourselves to the trail, back to where we came from.
The hike back through Crawler’s Ledge was way less scary this time around, having the experience once before already. The weather was great and with our hearts still filled with joy of the previous two days, we arrived in Hanakoa in about 3.5 hours. Since we had some extra time and a leftover energy, we decided to hike to see Hanakoa Falls. 1 mile (1.6 km) round trip of mostly level hike with some bushwhacking later and... What a sight!
If you too have some time and energy, by all means DO IT!
The rest of our hike we spent hiking and chatting, with little pauses for silence and nostalgia of recent events, but we were so happy (and we are to this day) that we decided to make the effort and spent time preparing for this amazing hike. Never in our lives did we thought we will be able to get to the island of Kaua’i yet that we will have the opportunity to complete one of the most beautiful trails on Earth. If you reading this trying to decide if you should hike Kalalau Trail, take our advice and by all means do it. It will change your life and make you not only a better hiker, but a better, richer in experience human being.
I’ll end this guide with a picture of us at the trail head after completing Kalalau Trail. We hope you enjoy this write-up and wish you great weather and unforgettable experience. Share your thoughts and see you on the trail!

USEFUL LINKS
Hawaii Department of Land and Natural Resources Online Reservation System- Camping permits
http://kalalautrail.com/ - compendium of knowledge about Kalalau Trail
GALLERY